| measure your card tube around one edge. Divide this into an
unven number and mark the resulting 'distance' onto the rim.
|
|
You should have many marks! Smaller gaps between marks mean more patience
and attention is needed, and will give a tidier and firmer weave! 17 marks
on my tube would have been better, the successful one I made had 25 marks.
|
When you have done the top edge, make a line from one mark at the top to the base
of the tube to get the marks exactly opposite. Then mark the same distance around the base.
|
Cut on each mark, about 1cm/1/2" long
|
Make sure your marks are exactly opposite and that all the gaps between marks are the same!
|
Place your warp through one of these cuts at the top, thread it through the tube,
take it to the base, pass it into the cut opposite to where you started at the top.
Then take it along the outside to the top, put the warp in the cut notch, take it to
the base ..... and so on. Do all the notches. Then knot the beginning and the end of your
warp thread together.
|
|
|
start weaving:
go under one and over the next warp thread.
 Leave quite a long end hanging at the beginning, you will weave this into your work
when you have finished it.
Leave quite a long end hanging at the beginning, you will weave this into your work
when you have finished it.
|
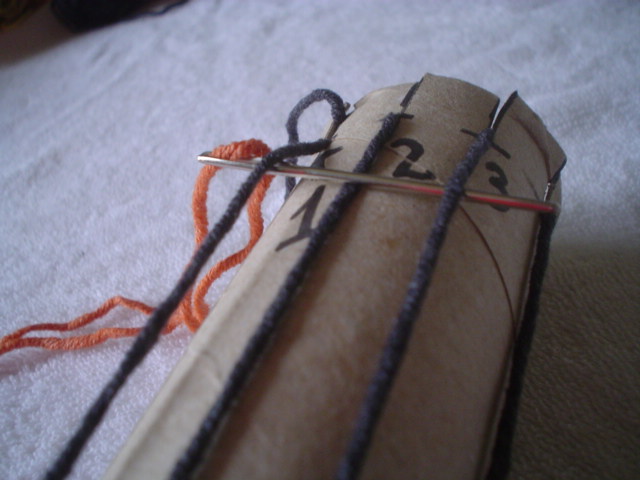
see how the needle lifts the warp away from the tube? This pulled the warp so much
in the notch, that the card between each set of 2 notches soon became 'floppy - - and
the threads slipped out! So: Put your warps closer together, and don't pull it too tight!
And pass your needle under each alternate warp, one at a time, not like I show here passing
under 2 warps in one go.
|
here you see that in the first row of weaving the brown weft yarn passed under the black
warp number 1 ...
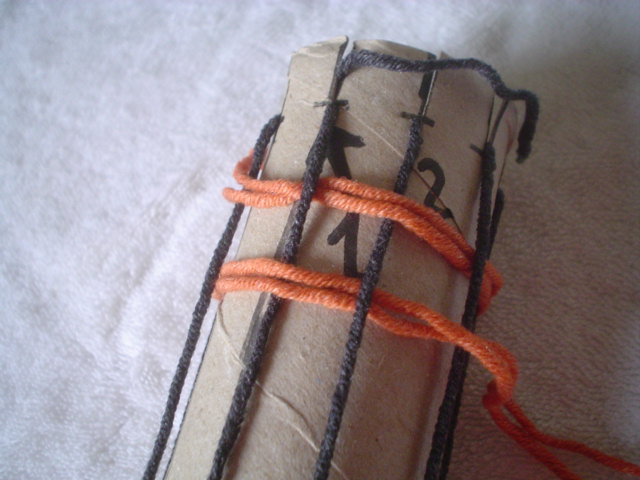 on the second row it passes over number 1 warp.
|
To change colour (and when you have to join two ends of your yarn):
end the first
yarn under a warp and put the new yarn next to the one you have finished with, under the
same warp
|
|
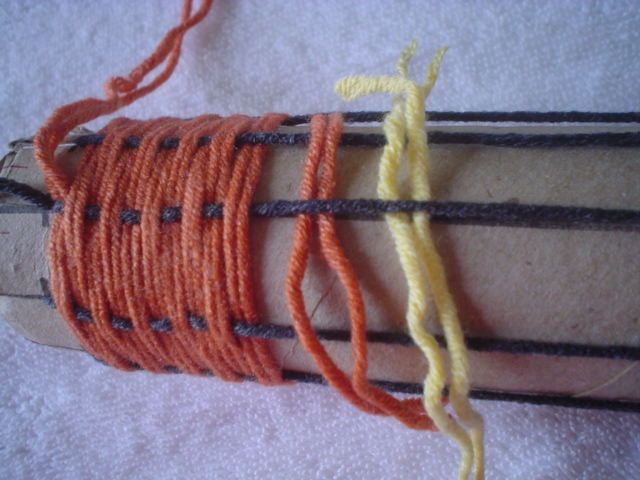
I have left the ends of the two yarns very short. Do leave longer ends of each of
the two yarns : it will be so much easier to tie them together when you have finished
weaving, just before you cut and take the warp off the tube.
|
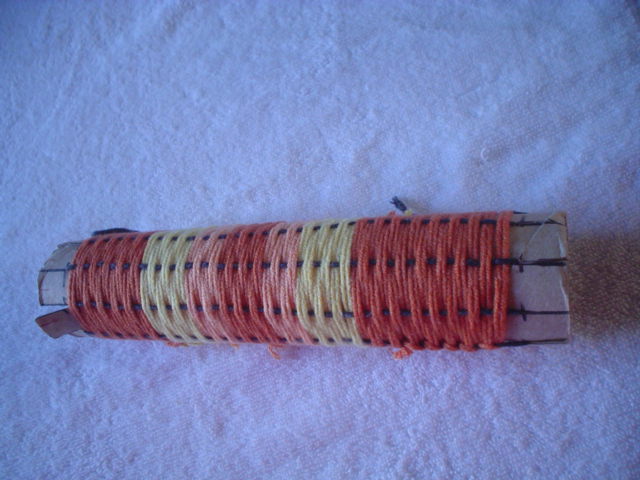
| weave right to the other end of the tube. Remember to push the rows together.
|
|
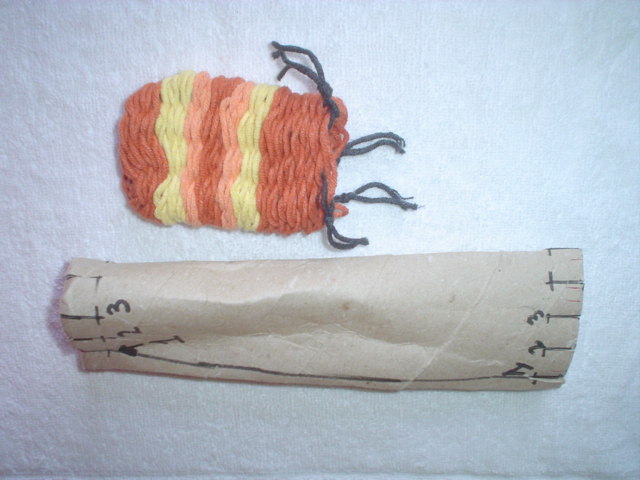
I did not "beat down" the rows hard enough, you will see that the finished item
has not enough rows, it is much shorter than I needed : it was supposed to hold my glasses!
|
where you have joined a new weft yarn into the weave, you have to tie this to the
old weft yarn. Make a good knot.
When you have done all the joining, take the tail of weft
where you started, and 'weave' this upwards along your work through some of the weft
threads.
Then do the same with the tail of weft yarn at the edge where you finished weaving.
|
go inside the tube with your scissors to cut the warp threads as far towards the
middle as you can.This may be difficult, get help if you need it!
|
Do not cut any warp near where it sits in the notches you made along the rims :
the weft will slide off and you may not have enough warp to hold on to.
|
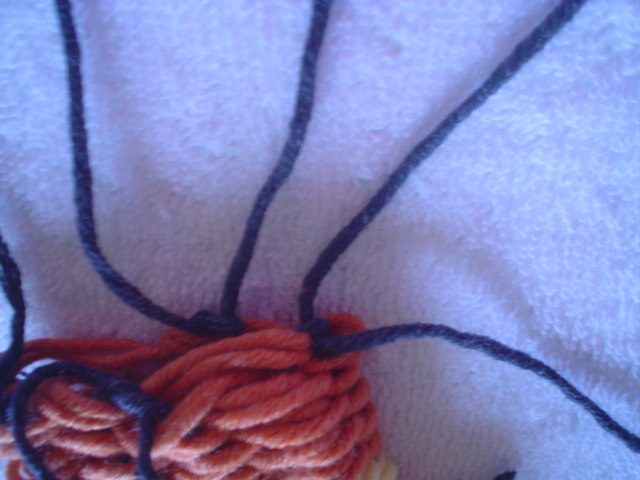
carefully pull the warps sitting in the notches at the top, out from the tube inside,
and then lift them towards you through the notches. Take the yarn from notch 1 and 2, and tie
together.
Then tie together the yarn from notch 3 and 4, 5 and 6, and so on.
Tie the last yarn to one of those you did before.
|
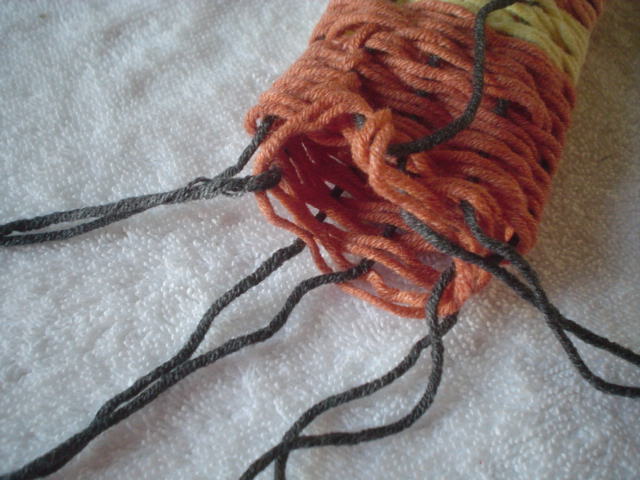
Then lift the warp yarn out from the notches on the other side of the tube.
Carefully push the edge with all the knotted warp threads, towards the edge of the tube
where you have not yet knotted the warp threads.
|
Hold all those 'open' warp threads in one hand and pull your work off the tube
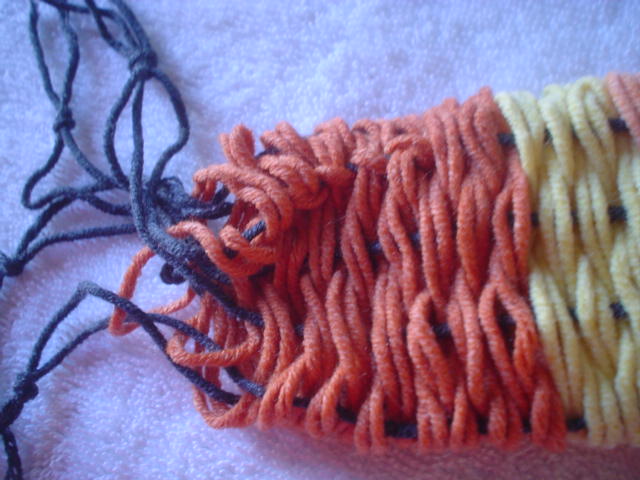
This edge is very loose, be careful not to loosen any warp threads in the tangle on the table!
On the photo you see clearly how loose this work is, all those gaps between the rows and the
warp threads ..........
|
take the knotted pairs of warp threads, tie them all into one 'end knot'.
Hold the 'open' warp threads tight, and push your woven tube of weft down towards
the big 'end knot'. Keep pushing........
|
|
... and I thought I would have a pouch long enough for my glasses. It's too late
to add more rows!
|
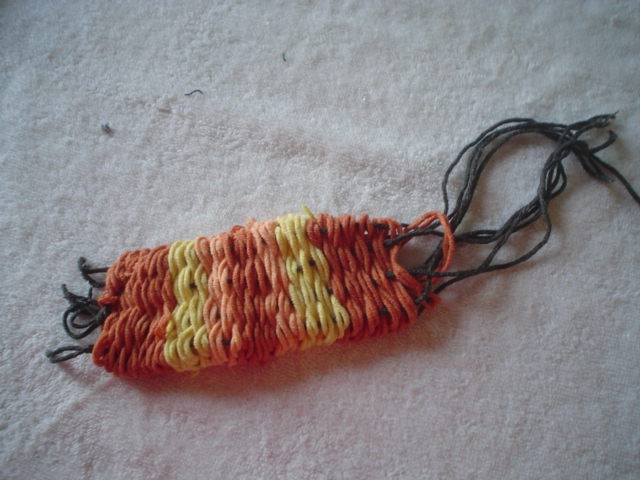
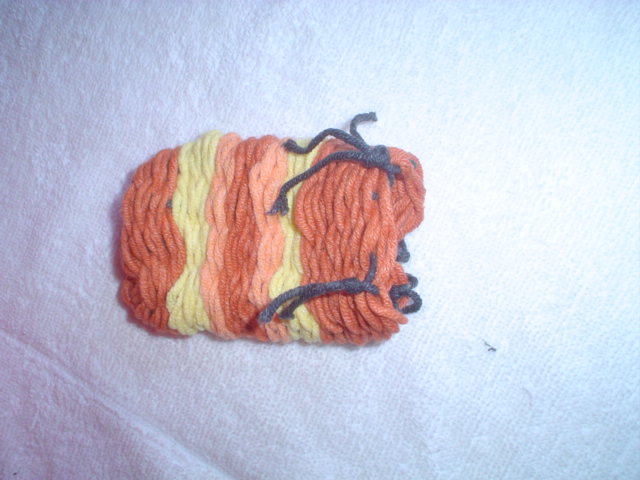
one last look at the pouch:
|
here you see how much the weft has been pushed together
the pouch is about half as long as the warp threads were between the top and bottom notches.
|
it is impossible to put anything small inside because the gaps between
the warp threads are too large (remedy: cut many more notches to get more warp threads)
and the gaps between the rows of weft are too large (remedy: finer and less
stretchy yarn as the weft, and less distance between the warp so that it binds the
weft better).
|