-<>- Learn to weave -<>-
< < < Lesson SIX > > >
-<>-<>-<>- how to weave a little faster -<>-<>-<>-
Part Two
the Rigid Heddle
>-<->-<>-<->-<>-<->-<>-<->-<>-<->-<
What is a rigid heddle? A heddle is a type of comb, and rigid means that it is not floppy and soft.
Maybe this will give you an idea, but how can it help a weaver? I'll explain and show you.
A rigid heddle takes over three types of work a weaver hast to do. It is almost as large as the weaving frame or loom is wide inside the wooden side panels.
1 ~~ It beats down the entire length of a woven row. That is why you have to put your weft in quite loosely
(at the upwards angle I showed you)
2 ~~ It takes over the work of the leash stick: it lifts up every second warp thread.
3 ~~ Then it pushes these warp threads down and allows the others to stay up, to create the shed.
You will find a rigid heddle on some larger weaving frames and looms which are designed for weaving thicker yarns,
or natural materials. Use it to weave thicker table runners, panels, thick ccushion covers and bags, and rugs.
You weave the linnen weave on it because it only allows passing the shuttle 'over-1-under-1' because of the way it is made.
It lifts and lowers the warp with one single movement, you only need one item to make the shed.
To give this weave pattern a different look you use coloured yarns and different types of yarn, for easy effect.
You will rarely find a rigid heddle in shops. You have to order it and it can be expensive. But if you weave the
linnen weave, such an item will help speed your work up a lot.
As I want you to enjoy weaving and do a lot of it, I have had this idea for an easy rigid heddle. Once you
weave well with it, you can try to get it made in fine ply wood, and if that suits you, maybe you
can get a present of a 'real' rigid heddle?
The work I describe now might be a little complicated and some of it is dangerous: please get someone to help or supervise you.
A rigid heddle is quite high and is used on weaving frames where the beams are high. But you are lucky if
you have a small weaving 'frame' : it has no base. You place the edge with the warp beam on a table, and
the edge with the cloth beam in your lap. Now you have space to move the rigid heddle up and down in.
You will need:
2 rectangles of some solid corrugated board, the long sides should be almost as long as your weaving frame is wide inside
between the long side pieces, the short sides should be about 25cm high
some strong firm carton (if possible a little thicker than the carton used for boxes of breakfast cereals),
you need 2 pieces as large as the corrugated card
strong glue for card or paper, not too liquid (as it has less water it will dry faster and won't soak
into the card). Or you use PVA glue (woodworker's glue). You will need a brush, too
Cutter with a sharp blade
hole punch as used in office or school
pencil (and eraser if you make a mistake) and a coloured pencil
ruler - - if at all possible it should be a metal one because you need it to run the cutter along its edge
a really thick layer of card or other hard material, for cutting on (you don't want to cut into the table top!)
And now you need to look carefully.
place your card with the short sides left and right.
Draw a line 1 cm from the
short edge, and then all along the length of the card, a line every centimeter.
|
draw a line between the center points of each short side. Do this on both card pieces. |
|
On the corrugated board: take the coloured pencil and draw lines at 5cm from the long edges, and at 4cm from the short edges. |
take one of the corrugated boards. Starting on one of the short lines, draw a line with your normal
at 1cm distance. Continue drawing lines at 1cm distance and on to the end. These lines should be as long as the board is high. |
|
 |
|
 |
|
|
|
|
|
|
on the two card rectangles, cut along each pencil line to make 'bands' of 1cm width.
Then: cut along the coloured pencil lines inside each corrugated board rectangle, you will make two frames! |
|
|
punch a hole into each card band, exactly in the center of the 1cm width and on your pencil line |  |
|
from now on I will call these card bands with their holes "slats"
and the holes I will call "eyes"
These two words are for your & |
|
|
|
| now you have to glue two of the card slats together. Be careful: the holes and the edges must be
exactly on top of each other!! |
 |
|
When the glue between the two card slats is dry, you will have some good slats which you can use (with care though).
Now you glue a slat onto one of the corrugated board frames. You put the glue on the frame. The first
slat is glued right next to one of the short sides of that window inside the frame ::: then you
leave a gap of 1cm ::: that is easy because you drew the lines at 1cm distance::: then you glue another slat,
then leave a 1cm gap and glue another slat... right to the end of that window in the frame. |
you start with a slat next to the frame, and finish with a gap. It is possible that this gap is larger
than 1cm and might even be 2cm.
Because you push and pull the rigid heddle to make the shed, and you pull it towards you against the woven rows,
it has to be quite strong. That is why you have to glue the second corrugated board frame over the the first,
covering the slats you glues on.
|
Now you are the owner of a useful rigid heddle, to use on your weaving frame, but also on a backstrap loom.
To weave with a rigid heddle you will also need a shuttle (it can hold a lot of yarn) and a smooth crochet
hook that fits easily through the eyes in the slats.
Please warp up your loom again; use slightly thicker softer yarn, and don't pull it too tight for your first attempts:
this will help keep your slats and eyes in good condition (hard thin yarn, and yarn that is too tightly stretched, will quickly
cut from the eyes down into the slats because the card is not all that strong!).
Count all the slats and gaps between them: this is the number of warp threads you can put on your frame/loom.
Tie the warp threads at 1cm distance between each, to the warp beam. Leave enough warp thread ... ... and concentrate again!
Place your frame on the table, hold up the rigid heddle.
| Remember you have a thread for each eye and each slot. Take the second thread and pull it
with the crochet hook through the eye in the first slat. |
 |
| Careful, the very first warp thread on your warp beam will later go through the first slot in your
rigid heddle! |
Continue like this: every warp thread which has an even number is pulled through its eye
in its own slat.
eye with warp thread, slat without, eye with, slat without ... to the end.
Do not at all change the sequence of the warp threads: don't put thread number 17 through eye
number 6 just because it might be easy. Number 17 takes up the 17th place on the rigid heddle, which is the
9th slot.
|
| This drawing shows all the even numbered warp threads in the eyes |
 |
Now you take the 'uneven' warp threads and thread them through the rigid heddle. Thread number 1 through slot number one, thread number 3 through slot
number 2, thread number 5 through slot number 3 ....
When you prepare a rigid heddle which does not have a support strut to sit on (the larger frames you buy have these)
it is a good idea to start by threading up through the eyes. |
And here is a drawing of the uneven warp threads in their slots.
|
 |
After all this work your rigid heddle will look like this: |
And now *************** I will show you how to use the rigid heddle for weaving. I did say that you pull it upwards
and push downwards.
It looks like striped surface: the stripes are all the warp threads. There is quite some distance from
one to the next because there is such a distance between each eye in the slat, and also between each slot.
And under them you have another
those are the warp threads that sit in the slots.
| Pull the rigid heddle up and see how the threads in the eyes come up. |
In my drawing they are the even threads, I've coloured them blue. |
 |
| Push the rigid heddle down and you push all the eyes and threads in them, downwards.
The uneven threads now are on the top. |
You have to push the rigid heddle so far down that the threads in the slots touch
the top edge inside your corrugated board frame. |
 |
| And of course there is a 'resting' or 'neutral' position.. |
All the warp threads are side by side, none is streched up or down |
 |
| This animation shows how it works:::::::::::::::::::::::::::: |

|
|
Onve you have finished weaving a row, put the rigid heddle in the resting position and pull it gently (your card and board
are not too strong...) towards you to beat the row down. Then take it back towards the warp beam, and continue weaving.
All I have to do now is to wish you A lot of Fun and success.
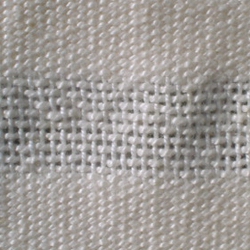
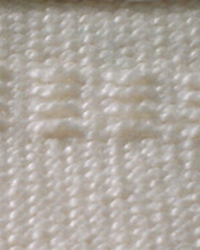
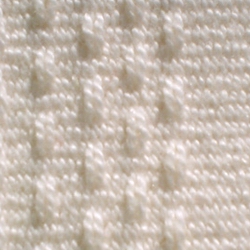
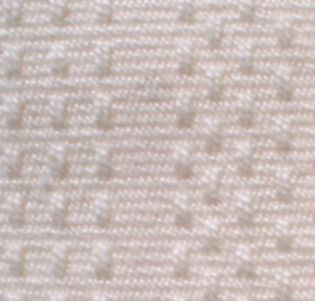
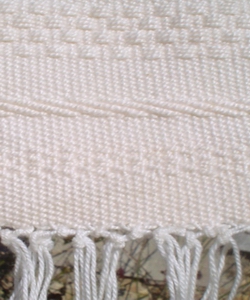
To finish this lesson I show you some weave patterns you can make without any such help, but with a lot of
concentration, patience and your weaver's workbook (and a few pieces of note paper to write down how far you
have gone in a pattern). This is a small decorative wall panel, woven on a larger loom, and counted out (
that means I did not use leashes or rigid heddle...)
If you want to try something like this, it is especially important to write down the pattern and make a drawing.
And remember you can change colours, type of yarn, force of beating down.
I HOPE YOU REALLY ENJOY BEING A WEAVER

And now you have arrived AT THE END
of the basic weaving lessons !!!!
It's nice to see you have worked to get this far ! ! ! ! ! When you started lesson one, and maybe were
confused and worried about all those technical words and thos strange images : did you realise you would
get to the end of the lessons?
Well, YOU DID IT !
CONGRATULATIONS

|