X:X:X:X Weaving to make a ... ?? X:X:X:X

Now you have woven some fabrics, or decorative objects ...
WHAT CAN YOU DO WITH THEM ? ? ? ?
Here are a few ideas !

a branch Nature-Loom to bring nature into your room
stickweaving is ideal to weave bands
Fun-weaves and "RecycLooms" : use throw-away objects as a loom, use unusual objects to weave on

or click here to go to the weaver's shed

  ~~'~~   
  ~-~ 
The
Nature
Loom
  ~-~ 
  ~~'~~   

Decorate your Nature-Loom web to a 'theme'.
This will make a nice decoration for your room or your home, or make it as a gift for a friend!

For a theme of 'autumn' you have woven with yarns of earthy or muted colours, and you left some leaves on the branches. You might want to use 'colourful' items to decorate your branch with. You cannot put anything heavy inbetween your warps and wefts. You have to think what garden products and plants mean "autumn" to you and look at their colours. If these items can't be woven ito your web, then look for things of this kind of colour which can: ribbons, fabric bands, plants, paper, yarns and other materials.
Put all the natural things (cleaned before use is you can) you found in the garden or forest or park, on your work-table: brown plant stems, dry ferns, ivy, fine branches, pieces of bark, tendrils of marrows or vines or pumkins or wisteria, large colourful leaves. Some flowers have beautiful seed-heads which stay on the plant in autumn, raspberry canes are very attractive when the plant has stopped growing.
Decide which colours and shapes would look good - - - put your branch on the floor or table, and put on the top of it all the things you think might be good autumn decorations to weave into the web on your Nature-Loom branch - - - Weave some of the larger natural items inbetween the warp and weft threads. Weave ivy and other winding or hanging plants through and then maybe let them hang off the branch. Make sure you have just enough items to give the impression of the theme, and that the colours go well together.

Stand back and see if it needs more colour : if yes then try using some of the other materials you have. Put the nature-loom upright against a wall, step back and admire your work.
WELL DONE !!!


a "Christmas" web-branch
You weave with red, green, white and yellow yarn.
Then use an old sponge or rag or a very large brush and some creamy-white paint, and put some large patches of paint on the branch. No need to paint it all over.
Weave with tinsel and angel hair between the warp and weft, also try gift ribbons and bead-garlands. Weave a few sprigs of ivy or holly or cypressus between the colourful threads : you have a festive woven decoration! It would make another nice gift.

For a summer holiday web-branch ...........
A seaside theme would be good. On a beach you find lots of things the sea brings on land, many can be interwoven into your web you have prepared on the nature-loom.
Use bits of thick rope or string, bits of wood or driftwood, dry seaweed (or make some from brown parcel paper or gift ribbon), ribbons torn from an old towel or floor cloth or dish cloth; cut out pictures of fish and antique statues from magazines and glue a few to your web. If you can, dab-paint your "seaside memory web" branch creamy-white.(dab a piece of cloth or a sponge into the paint, then dab this on the branch, here and there. No need to paint the branch completely.) Maybe you can take your nature-loom home after your holidays as a reminder, and to show your friends.

to the list at the top of the page
 ~~'~~ 
 ~-~
STICK
 WEAVING 
also
called
PIN
 WEAVING 
 ~-~
 ~~'~~  
You want to weave a good length on the 'pins' or 'sticks'?
Then here is what you can do with that.

*...belts to tie round the waist.
for these you need warp threads twice as long as your waist measurement. If you want really long ends hanging down then use warps three times as long.
Use solid yarn for the warps, fine and not too fluffy will work best, and any yarn for the weft.

*...belts with a 'fastening'
You need solid warp yarn and any type weft yarn. Prepare your warps giving them the length of your waist measurement plus half as much again. After about 7cm/3" of weaving you make a buttonhole. I has to be not quite as high as your stick-loom is wide!
Then weave some more rows until you to get 5cm/2" from the buttonhole (count the rows and remember this number !!). Make another buttonhole as before. Weave 5cm/2" plain lemgth, make the 3rd buttonhole, weave 5cm/2", make the 4th buttonhole.
After 4 buttonholes you just continue to weave until the end of the warp (don't forget about the knot to finish!)

Use the buttonholes like any buttonhole:
you can push a button through it, and this will hold your belt around your waist.
But you can also tie the ends of the warp threads through one of the buttonholes.
Be inventive : instead of a button you can use large beads, a small piece of stick, a nice clean plastic bottle top (make one or two holes in it) that you sew to the other end of your belt like you would do with a 'real' button.
But as you are a weaver, thread the other end of your belt through the buttonholes: go through to the back, along, out through to the front, along, through to the back, along, and come out to the front through the last buttonhole .... :-)

*... a bracelet or necklace
Weave these on fine straws about 10cm/4" long, use 4 or 6 for a thin bracelet, 8 or 10 or 12 for the necklace. To make these look good use in each straw 4 strands of an 8-strand embroidery floss, or fine crochet cotton, as a warp and embroidery or crochet cotton (like for pot-holders) as a weft. Make a buttonhole and sew on a button, or keep long warp threads after the finishing knots to fasten your work around the wrist or neck.
These bands can be decorated with embroidery (a name or message) or you can sew fabric flowers or beads on them.

*... a Christmas tree decoration
this is like the bracelet above. You use 6 fine straws, and have metallic embroidery floss as warps and weft. Make your knots as usual. On one side you plat the long warp threads (make 2 sets of 3 threads) to get 2 plats hanging down, on the other side do the same but then knot both plats together at the top: this will give you a 'loop' for hanging your decoration.

*... a bookmark
Use fine straws about 10-12cm/ 4-5" long, and use 8 or 10 straws. Use warps of 35cm/ 13" length. Use fine crochet cotton or 4 strands of an 8-strand embroidery floss. Finish the base with a very tidy knot, leaving 7cm/3" as a fringe. The other end that's kept in the book should be finished most carefully. Take just two warp threads together, knot them close to the fabric; continue to knot the other warps, in sets of two. Then take each individual warp thread and sew it into the body of your fabric.

*...a jazzy wall decoration
To jazz-up your room you want CoLoUrrRRR there! Weave with some thick yarn for your warp and weft. The weft is what you see most of, so use the colours you want and weave stripes and stripes and more stripes.
Remember how you joined the yarns together when you made a buttonhole? Passing one from one side and the second from the other?
This way of putting a new thread into what you are weaving, is the right technique for making STRIPES ..........      EXPERIMENT !!!      You can weave EACH stripe with the same number of rows for each colour (that gives each stripe the same height as the other), or weave each stripe to a different height.
Because you won't wear this item you can just snip the ends off, the work won't fall apart. But for another look you can leave the threads hanging down, looks great if you have lots of colour changes!
Remember making a buttonhole? I used two different colours to show you that it is made in two halves. Copy this method with the 2 colours : you will have two different colours on a stripe section! But remember you have that split between the two colours.

*...a strap for a bag or to tie round books
You need solid warp yarn that won't stretch, and weft yarn that is not too stretchy nor too soft. Just weave as much as you need. NOTE : for the book-holding band it will be best to sew in all the ends of your warp thread. For the bag handle it might be nice to have the warp threads hanging from the band.

Some more ideas : if you have a lot of these bands and they are really long , you can sew them together side by side. You will end up with a large piece of fabric that can be made into a super-bag, cushion cover, baby's blanket, table mats, throw-over cover for an oldfashioned bedside table or a chair seat. Anything really where you use larger pieces of thick fabric.
A fashion idea:
sew your fabric onto the back of a jacket where it would give extra warmth in winter, or sew it over the shoulders. Of course you could sew together the ends of a short high stick-weave band and wear that like a collar or a hat, or wrist bands or ankle bands.
In fact, try using a different 'thread' as your warp: some thin elastic as sold for hats. This allows you to make stretchy items, ideal for ankle, wrist and head bands!!

Yes, of course : you can use many stick-woven bands as the warp and the weft, to weave a super-thick rug...


this is wide, the band doubled and sewn to make pockets. It holds shuttles
to the list at the top of the page
 °°`´°°`´°°`´°°
        Box       
      Loom    
      frame

 °°`´°°`´°°`´°°

square SQUARES and rectangular RECTANGLES

A square of about 25x25cm (9x9") woven with thick crochet cottons makes
*... pan-holders of a sensible size (potholders). Don't forget to sew or crochet a loop in one corner so that it can be hung up.
If hot dishes are served at the table then make them into
*... thick mats to protect the table from the heat. I remind you again that for hot dishes and plates you must weave with thick pure cotton as anything that has man-made fibres in it could melt and create a terrible and even dangerous mess, and thin cotton won't protect the surface ! You can also use larger squares as a
*... place mat or table matsquare ones are a bit more unusual. You can embroider a name or decoration, or sew fabric flowers or ribbons on them. For the festive touch sew tassels to the corners.
*... a mug mat,
which is a very nice change from the 'ordinary' bought coaster everybody uses to protect surfaces from the heat or a rough base, of a coffee mug/ tea mug. Leave the warp threads long, then knot them to make an attractive fringe.

Be a fashion guru and make a ... ... ... ? ... !
*... jacket or top of many squares sewn together.
The smaller the squares the more sewing you have to do - - but the nicer the effect! If you have woven squares in colours that are very close on the colour circle, you will have a stunning elegant item.

If you weave small squares sew them to make a band which could become an interesting warm belt; larger ones sewn together you could drape along the neckline of a jumper to wear like a loose collar.
Sew large squares together and make a "Big-Baggy" bag to carry all your gear in. Or make them into
*... a scarf of as many colours and types of yarn as you can. Each one you make will certainly be a unique item, and it makes a great present.
You could make a bag-and-scarf set, or make the bag to go with that jacket or top ...
For the bag it would be wise to use yarn as the warp and weft that won't strech (much), all other items can be made out of any yarn you like. Hint: for the bag have your warp and weft threads close together - - otherwise things might fall through the gaps in the weave.

A rectangular shape woven with pure crochet or thick knitting cottons will make table mats, table center mats, table runners (a long mat that protects the table center from being scratched by vases or other decorations).
The latest table fashion seem to be place runners, long narrow mats that go across the table from one place to the opposite one. They are table mats and protective decorative table center all in one item. Weave them from a yarn that goes well with the curtains or table cloth, and any meal served at such a table will be a feast.
Again, for a festive occasion you can stitch tassels or ribbons to the corners, and for an "easy-add-easy-remove" decoration of the corners sew real flowers or silk flowers (this is an idea to recycle those silk flower heads which would normally be thrown away when the stem no longer looks good because flowers are missing).

Then: you can make with rectangles what you can make with the squares: bags, potholders, mats... but remember the rule about "cotton only" for hot things.

A small shoulder bag would be a good easy item.
Find how wide it has to be : that is the warp width. The warp length depends on the size of the bag. Twice the height you want plus 10cm or more to make a fold-over flap. You just need to stitch the two sides of the 'height' together at the selvage (look in the dictionary...) and let the flap hang down. Of course you can crochet a loop and sew this on the flap, and in the corresponding position on the front of the bag you sew a button, so that you can close the bag.
To make a shoulderbag you need to sew a band to the back of it, at each end of the fold of the 'flap'.

how to place the fabrics
to make a shoulder bag or a handbag
placing the fabrics to make
a back bag (rucksack) with a secret pocket.
NOTE 'front' panel has half only on the 'back' panel, half is free.
Fold 'free' half over to the back.
Stitch back and front together through the fold, 'trap' back panel in there!
The fashion is for rucksacks, you can make a unique designer "Back-Bag" model!
Use a solid warp thread, make the warp threads quite close (try the width of your thumb) so that the things you carry in the bag don't fall out, or get trapped, between the threads. Weave one long rectangle as the 'front', another even longer one as the 'back' (you need a 'flap' to go over the front: you know how high the bag will be, add the height you want for the fold-over flap to the height of the bag).
If you have mastered the buttonhole, then weave two quite near the outside edges, into the flap at about 7cm/3" from what you will weave as the last row.
A tip: make your first rucksack narrow, to see what it looks like on your back.

On my animation you see that I made the 'front' quite long: I have a lot of fabric that I can fold to the back to make a secret pocket! If you want that, then you need to weave two buttonholes into the part of the fabric you fold to the back... (or you can crochet two loops into the edge).

Stitch the base first: fold the 'front' panel where you think it will leave you enough fabric for the pocket at the back, trap the back in the fold, then stitch front and back together at the fold line at the base. Make sure the back panel is firmly trapped. Then sew front, back and back pocket together along the two sides of the bag. See animation.

For those of you who wear belts: make a BeltBag from a narrow rectangle. You need to measure carefully how high you want it, and how large a flap you want. Then weave a buttonhole (or two if you are going to carry bulky or heavy items) into the flap. To get the bag on the belt you need to weave two buttonholes as tall as the belt is wide, at the back just under that imaginary line you know is the foldline between the flap and the back of the bag.

to the list at the top of the page
  ´'`~~´'`~~´'` 

        FUN
    WEAVES


  ´'`~~´'`~~´'`
What can you do with a cup-weave?

When they look this good, and you wove with colours to match the place where you want them, then they are ideal to hold combs, paint brushes, tooth picks, make-up pens and sticks, and anything else that might be pointed or fine or get damp.

You can also use them without the glass jar if they don't have to hold heavy items.
They make a nice container for wrapped sweets or other small wrapped gifts, or hold a small potted plant. I have some on a bathroom shelf, in different yellows to match the paintwork. I keep cotton-wool balls, plasters, cotton sticks, and hair bands in them.
I have arranged them lying on their sides, 3 sewn together at the front where they touch; two more are on the top, also sewn on: this stops the family walking off with just the one they want (and forget where they left it...).

The "Circlarious" ring weaves
My favourite project, and one I make as presents for friends,
are door and window decorations.

The secret here is not to put too much decoration inside the ring, even if it's large.
Window decoration:
When it hangs at a window you want to see the lines of the web against the light. You only see shapes of any decoration you put on it so it is a good idea to use those which have a shape everybody knows, and only use one or two plus maybe some ribbon to leave hanging down.
As a door decoration
I add some things related to the people's hobby. A painter once had a "circlarious" with a web of multi-colour parcel string (I soaked the string in water and splashed watercolour paint on it). The decoration were an old paintbrush, a rag with a few paint spots, an empty tube of paint he gave me, a few bands of white paper with paint splashes.
I wrote his name, each letter in a different colour, on a piece of thick card which was in the shape of a painter's palette. I had covered the card with a piece of fabric (part of a sock I was throwing away). To hang it up I tied some ribbon at the top.

the dream catcher
and here a very artistic one, used to decorate a branch

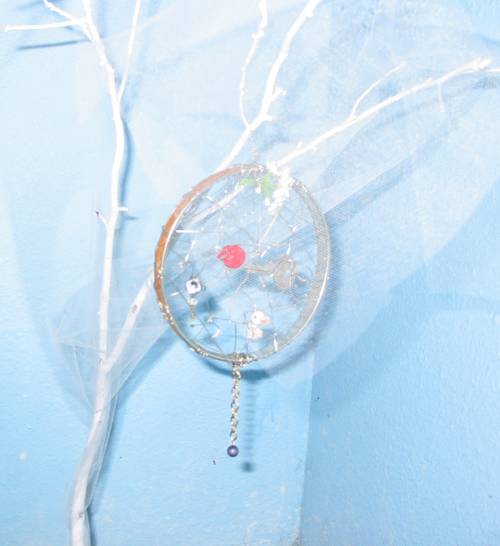
To the weaver's shed