-<>- Learn to WEAVE -<>-
<<< lesson THREE >>>
<>-<>- -<>- some weaves to try -<>- -<>-<>
-<->-< >-<->-
... still more about those threads ...
Welcome to the THIRD lesson !
B
In the last 2 lessons you learned a lot:
the threads fixed to the weaving frame or loom are called WARP
the threads that go across the warp are called WEFT
to pass the weft across the warp you need a needle and sometimes even a SHUTTLE
you BIND warp and weft threads in a special way to make a pattern of threads which holds
them together
* you need to keep the warp stretched quite well to make it easier to pass the weft, the shed
will stay open better
* because the yarn on your weaving loom or frame will shrink while you weave (it needs some of
the length to go over and under the weft, it does not lay flat across the surface!),
you need more length of warp than you want for the finished item
* the warp will shrink when you take the finished fabric off the loom because you stretched it,
another reason why you need to add extra length to what you want as the fabric length
* you continue the "over-under" movement of your shuttle or needle, even when you go round the
warp on the edges
you learned a lot of terminology
C
You learned how to warp up your loom!
* You learned how to weave the first row, and what to look out for when you turn to go back to
the other edge, so that the next row is good!
Well done so far !!!!!
You hold the keys to success:W
Now you will learn just a few more important things.
Then you will know all the basic things to
start you working on your own or with help, and I hope it will encourage you to
experiment. If something is not right you might be able to understand why,
by looking again at these 3 basic lessons.
So
here
you
GO ..........
|
|
I said something about wavey edges in the last lesson. Sometimes they are what you want, and I have
seen wall decorations which looked really good only because the edges were not as straight as a ruler!
When you weave with all kinds of objects or thicknesses of yarn it is terribly difficult to keep
the edges straight.
But when you want to weave a place mat that looks 'perfect' and won't catch the items on the table,
then you must have straight edges.
Now have a look at this weaving animation.
| I made the gaps between rows really large, but that is what happens every time
you put a weft thread in. This sort of fabric would quickly tear in the wash or
in use, and things could get caught in it. For items you want to use you must push the
warp threads together.
|

|
 You can do this with your fingers, but it is easier to do with a comb.
 |
The weaver can use the shuttle, pushing the flat shuttle edge against what he has just
woven. He can use a comb with teeth set at the same distance as the warp threads. If he has nothing
else he can use a kitchen fork, and on a narrow rigid heddle loom he could use the rigid heddle.
On the larger looms there is a kind of comb fitted to the framework.
Have another look at the weaving loom animation in the purple frame. There is a kind of 'comb
in a frame' beating down on the fabric.
On a loom with shafts, this comb is called a "reed", and it is fitted into a frame so that it is
easier to move up against and away from the weft you have bound into the warp.
J Discovery 9 :
To make the
fabric firm you have to push the rows firmly together.
& pushing the fabric together is called
to beat the fabric down.
& to beat down the weft threads evenly, a large loom has a
reed which has the teeth set at the same distance
as the warp threads are on the loom.
Have another look at the weaving on the brown frame. You see the comb beating the weft into place.
But did you notice that I drew the weft coming from the shuttle at an angle, going upwards??
On any loom to go out of the shed upwards at an angle is a good idea. Why? You remember that
the threads are lying flat when the shed is open, on one set of warp threads.
But when you close the shed (you do that when you lift up the other set of warp threads), the
weft gets pushed between the warp. This stretches the weft, and the warp.
If the warp gets too tight you can always loosen the warp beam. But if the weft
is too tight you will end up with waves and buckles in the fabric, which won't look good.
To avoid this you give some extra length to the weft! |
|
|
On a small frame two fingers' width between the woven part and the weft from needle/shuttle
should be fine, on larger looms you need more. Then beat the weft down.
J Discovery 10 :
Because the weft is trapped between the warp threads which makes it
shrink, you need a longer weft when it is bound into the warp than when you just lay it
across the warp.
So ........... now you can weave in the two directions, you go under and over the warp (or you
let the rigid heddle or the leash and shed sticks do the work), you give extra length to the weft .......
All you need to do is experiment with this "over-under" passing of the weft.
Go back to your kitchen towel, see that the weft goes over one warp or under one warp, at a time.
Now look at some jeans. Not easy to see where the warp and weft are! That is because
the threads are much finer. And also because the weft has been beaten up tightly to make a
resistant fabric (yes, it is stiff because the threads are so close that they don't have
much space to move about in).
J Discovery 11 :
When the warp and weft are very close, the fabric is quite stiff.
This pattern of 1 over and 1 under is the basic weaving pattern. It has been used for weaving
linnen because it always has the shortest distance between each crossing of each thread.
This makes linnen and other fabrics quite resistant to being pulled and moved. Unless you
allow too much space between the warps or the wefts.
.::'''::.::'''::.::'''::.::'''::.
.::'''::.::'''::.::'''::.::'''::.::'''::.::'''::
.::'''::.::'''::.::'''::.::'''::
Now you are ready to experiment a little! If you have a weaving frame without any method of
dividing the even and uneven numbered warp threads, the following instruction will be easy.
If not then you, too, will have to work the following exercise just with your needle/shuttle
of weft.
You will see how to weave a TWILL pattern.
Put your weft over the first warp. Pass it under the next. Then: pass it over the next two warp threads.
Then under the next, over the two that follow. As you get to the end of the row
look carefully at what you have done. You have to look at the last 3 or 4 warp threads and see
where the weft has passed. Do look carefully!! A good-looking weave can only be made if you
get this pattern of "1 under-2 over" right.
Did you have the weft going over 2 warps and then under the edge thread?
 Then turn round it, go over it and the next one, then you continue to weave the pattern
"over-2-under-1".
Then turn round it, go over it and the next one, then you continue to weave the pattern
"over-2-under-1".
Did your weft go over 2 warps only?
 then go
round the edge warp, under it and under the next, and continue the "over-2-under-1" pattern then go
round the edge warp, under it and under the next, and continue the "over-2-under-1" pattern
Did your row of weft end over one single warp?
 Then turn round it, under it, and continue to weave "over-2-under-1".
And here an animation: weaving a twill.
You can see that there seems to be a 'band' of red weft going up at an angle,
 and a narrow line
of blue warp also going up at an angle. and a narrow line
of blue warp also going up at an angle.
.::'''::.::'''::.::'''::.::'''::.::'''::.::'''::.
.::'''::.::'''::.::'''::.::'''::.::'''::.::'''::.
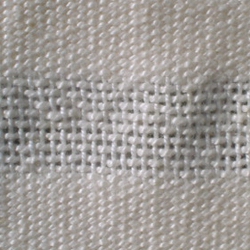
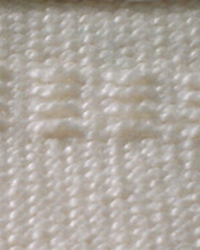
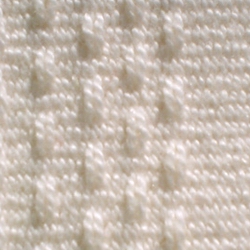
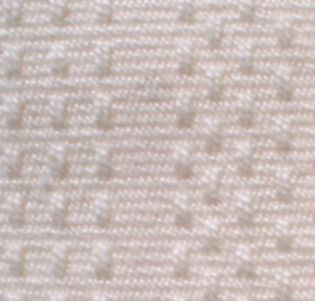
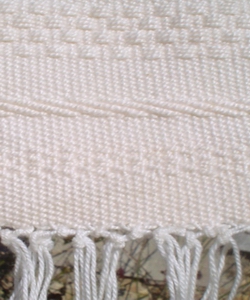
And to end your lessons I have some photos of different patterns made only with the warp and weft.
You have to experiment to see what YOU can do! And don't forget, some patterns will look
quite different if you weave them loosely (nor beating down too much).

You are SUPER !
CONGRATULATIONS !!
HAPPY WEAVING !!!
|